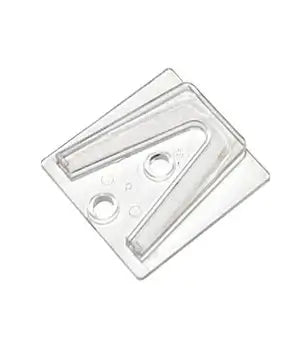
Flat parapets and architectural ledges often lack the edges used by conventional roofline clips. The Parapet Clip is designed as a companion to the Original Shingle Tab, creating a base for suitable flat-surface installations where the site allows an approved permanent attachment.
This guide focuses on the Parapet Clip and the decisions that help contractors turn its listed specifications into a repeatable field plan. For a broader purchasing framework, review How to Buy Commercial Grade Christmas Lights.
Product details to verify
- Accessory designed to work with a shingle tab
- The product listing states that it is not intended to be used alone
- Designed for suitable flat surfaces
- Listed attachment approaches include screws, glue, or caulk
- 100-count packs and 2,000-count cases are listed
Permanent attachment requires site-specific approval
A screw, adhesive, or sealant that works on one parapet can fail or damage another. Identify the substrate, coating, waterproofing system, drainage path, temperature range, and property-owner requirements. Obtain approval for penetrations or adhesives and follow the selected manufacturer’s preparation and cure instructions.
Plan the field conditions
Install a small test area and confirm that the shingle tab, socket, and bulb align correctly from the primary viewing angle. Plan expansion joints, corners, roof access, and service paths. Any penetration or sealed attachment must preserve the building envelope; when that cannot be assured, use a different engineered method.
A repeatable contractor workflow
- Document the flat-surface substrate and obtain required approval.
- Select an attachment method specifically rated for that material and exposure.
- Test one assembled parapet-clip and shingle-tab position.
- Lay out consistent spacing before permanent fastening.
- Inspect attachments each season and document removal of the light line.
Where this product fits
Parapet Clips can reduce recurring setup time on appropriate properties because the base remains in place while the light line is removed. That benefit depends on precise initial layout and responsible treatment of the building surface.
Build the full job estimate
Estimate quantity from the actual attachment points, power zones, or repair tasks—not from a rough property average. Include compatible companion parts, prep labor, testing, access conditions, removal, and a reasonable service quantity. Small accessories can protect job margin when they are specified up front, but they become expensive when crews discover them after arriving on site.
Plan service, removal, and storage
Add the component to the job’s service notes and photograph any unusual placement. At removal, inspect for cracking, corrosion, deformation, loose connections, or damage and retire questionable parts. Sort reusable hardware by exact type instead of mixing it into a general clip or accessory bin.
Check the current configuration before ordering
Product options and ordering status can change. Use the live product page to confirm the exact variant, specifications, included components, warranty terms, and current ordering details before committing materials to a customer project. Avoid substitutions unless the design, electrical plan, and customer approval are updated together.